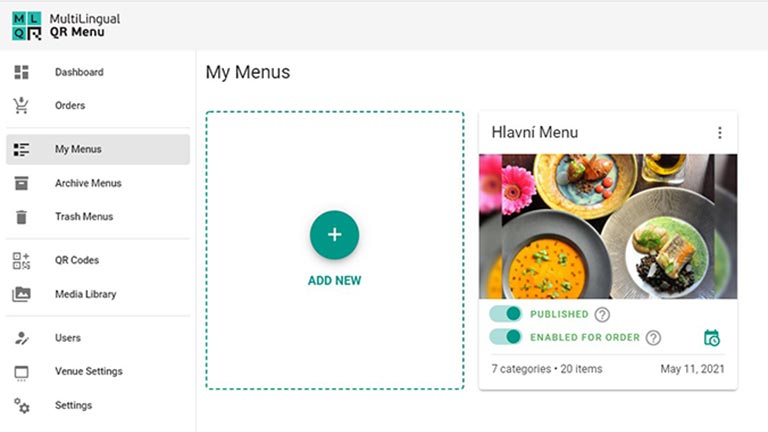
Sign in with your desktop or tablet. Click My Menus to create a menu or update an existing menu.
1. Create a Menu
Click or tap “Add New” in the My Menus section or “Create a Menu” link in the Dashboard
2. Adding categories
You can add a new category by entering its Title and image (optional), then click Save.
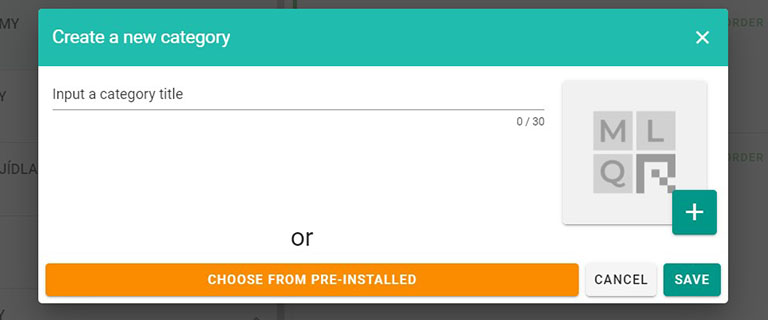
You can also click the “Select from Preset” button and select a list of categories. They already have stock images and the names have already been translated into some other languages. After selecting and saving the changes, you can change the names and images as you like.
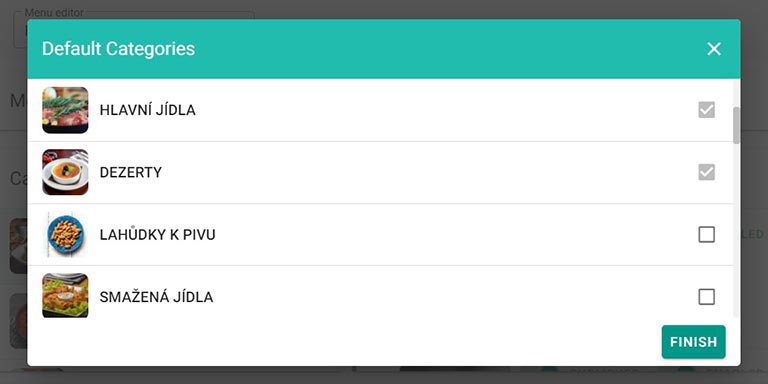
You can add more categories or change them later if needed. When you click the Finish button, you will return to the Menu Editor.
3. Add new Items/ Dishes
Start adding your dishes on “Create a New Dish” section.

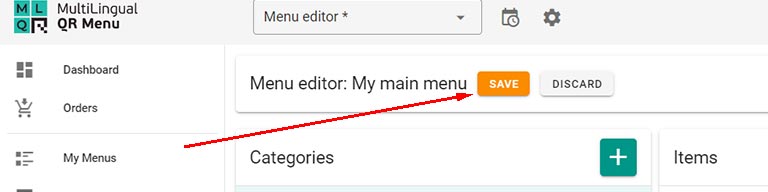
4. Save the changes
After making changes don’t forget to Save the menu.
5. Publishing your menu
You can activate your new menu now or later.
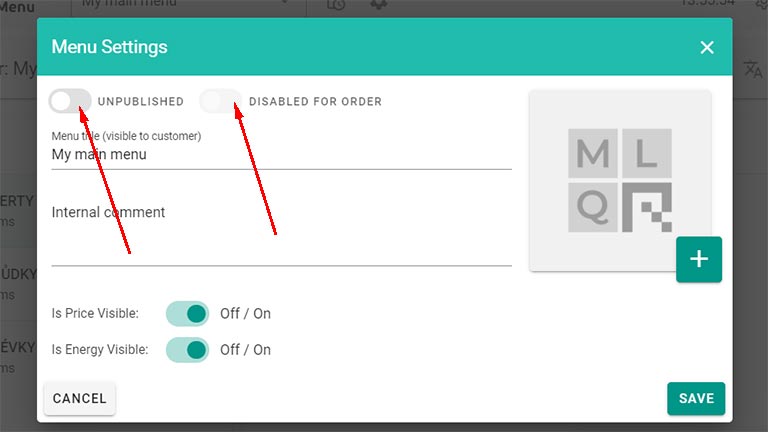
Go to current Menu Settings

You can Publish the menu and Enable for ordering.
You can now view your menu using the Preview tool or in the customer front-end of your venue / store.